
Installing Solana CLI in an Easy Way
Setting up the Solana CLI manually on Windows by grabbing the binaries straight from GitHub is a great way to have full control over your development environment. It sounds like you had a few autocorrect typos in your request, but you are looking exactly for the right thing: going to the Solana Labs GitHub, downloading the pre-built binary, and manually adding it to your Windows PATH.
Here is a straightforward guide to get you set up.
(A quick factual note before we begin: The core Solana Labs client recently transitioned to a new developer team called Anza, and the software is now called "Agave". You can still find the releases on the Solana Labs GitHub, but going forward, the most up-to-date versions will be on the Anza Agave GitHub repo. The steps below apply perfectly to both!)
How to Manually Install the Solana CLI on Windows
Step 1: Download the Pre-built Binary
Navigate to the official releases page. You can either go to the Solana Labs GitHub Releases
Look for the Latest stable release (for example,
v1.18.26orv2.0.0).Scroll down to the Assets section at the bottom of the release notes.
Download the Windows binary archive. It will be named something like:
solana-release-x86_64-pc-windows-msvc.tar.bz2.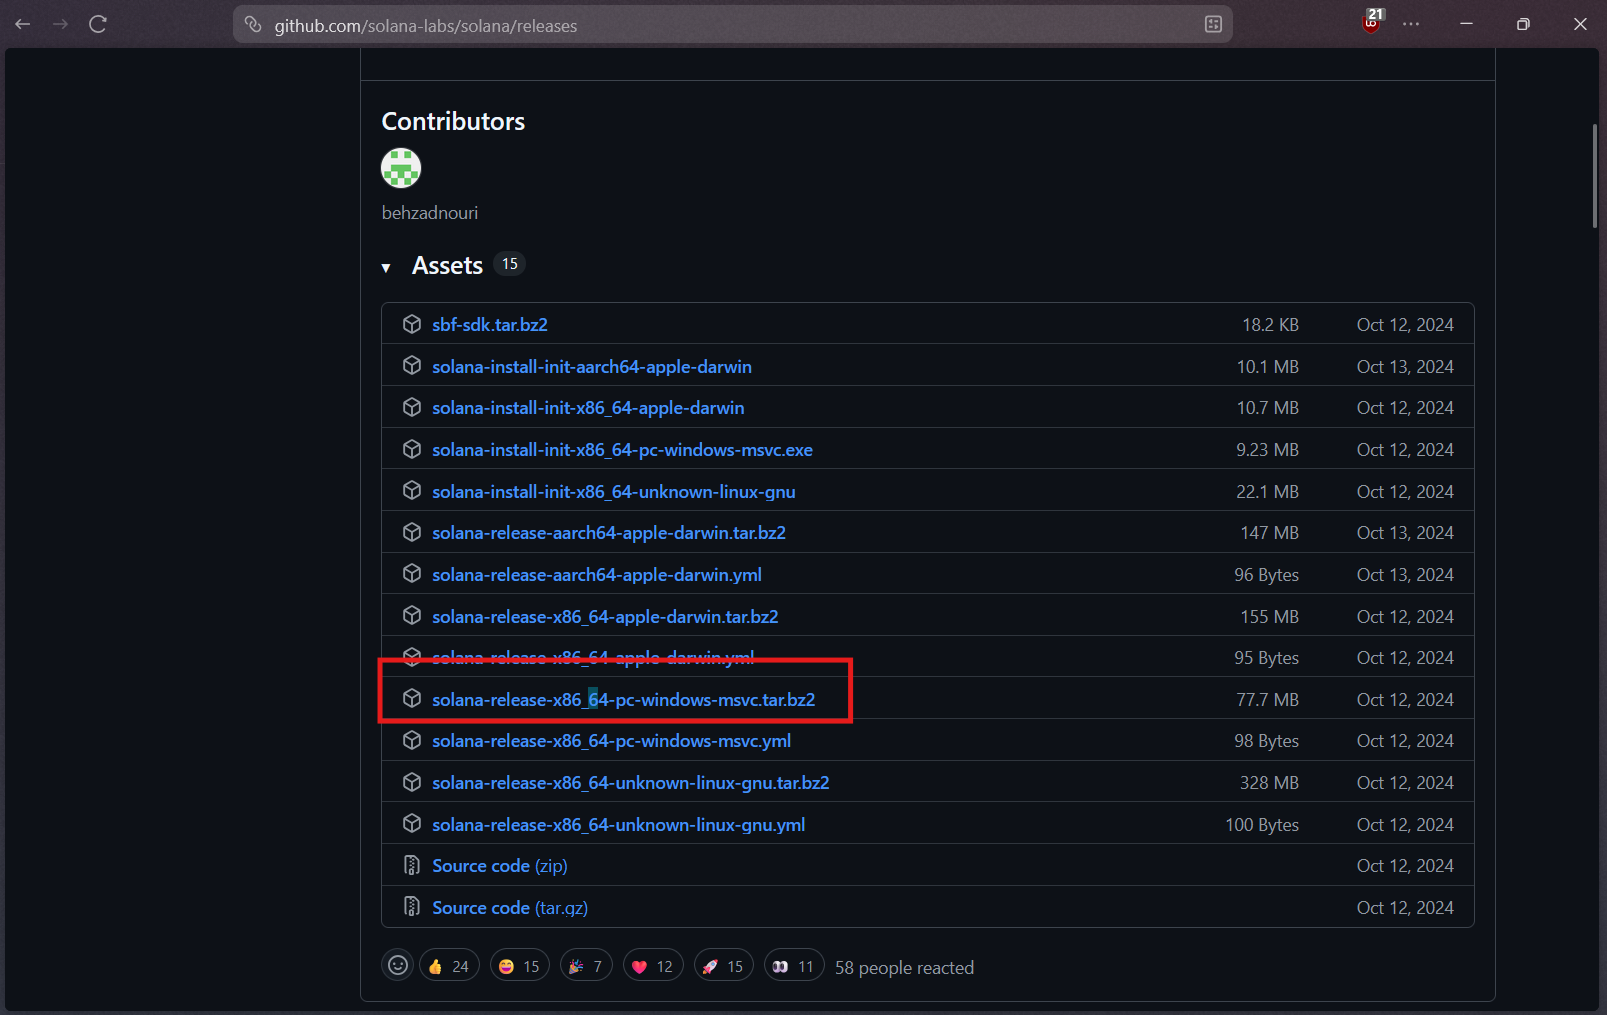
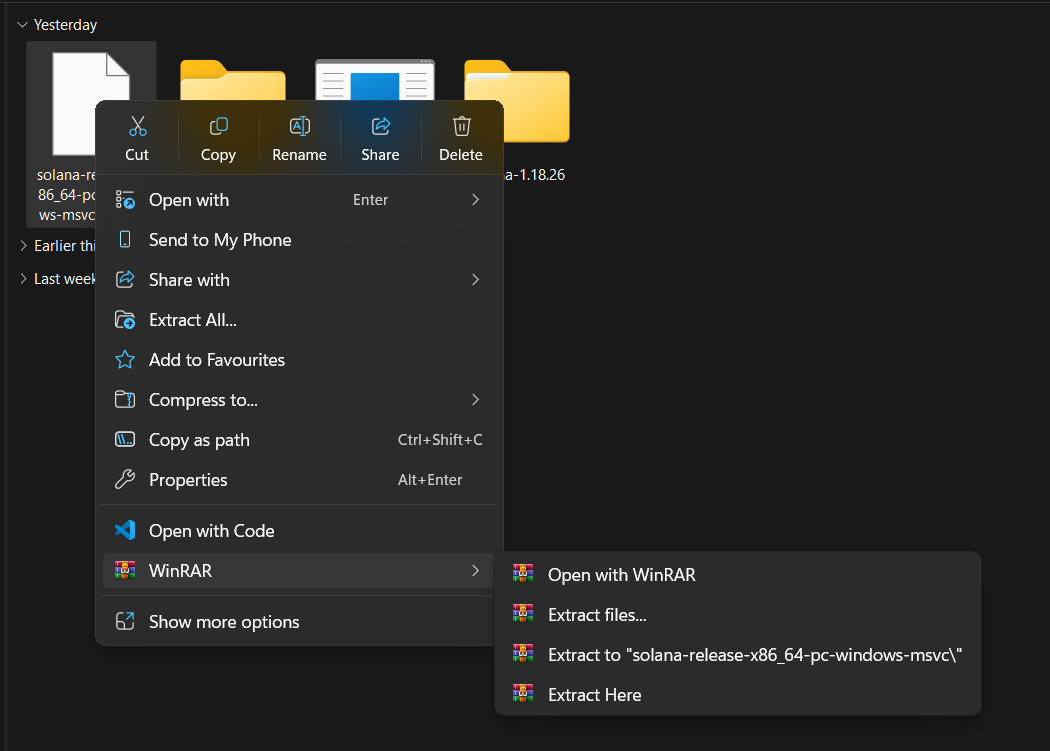
Step 2: Extract the Files
Windows doesn't always natively handle .tar.bz2 files, so you may need a free extraction tool like 7-Zip or WinRAR.
Open your extraction tool and extract the downloaded file.
Move the extracted folder (it should be named
solana-release) to a permanent, secure location on your hard drive where it won't be deleted. A good spot isC:\solana-release.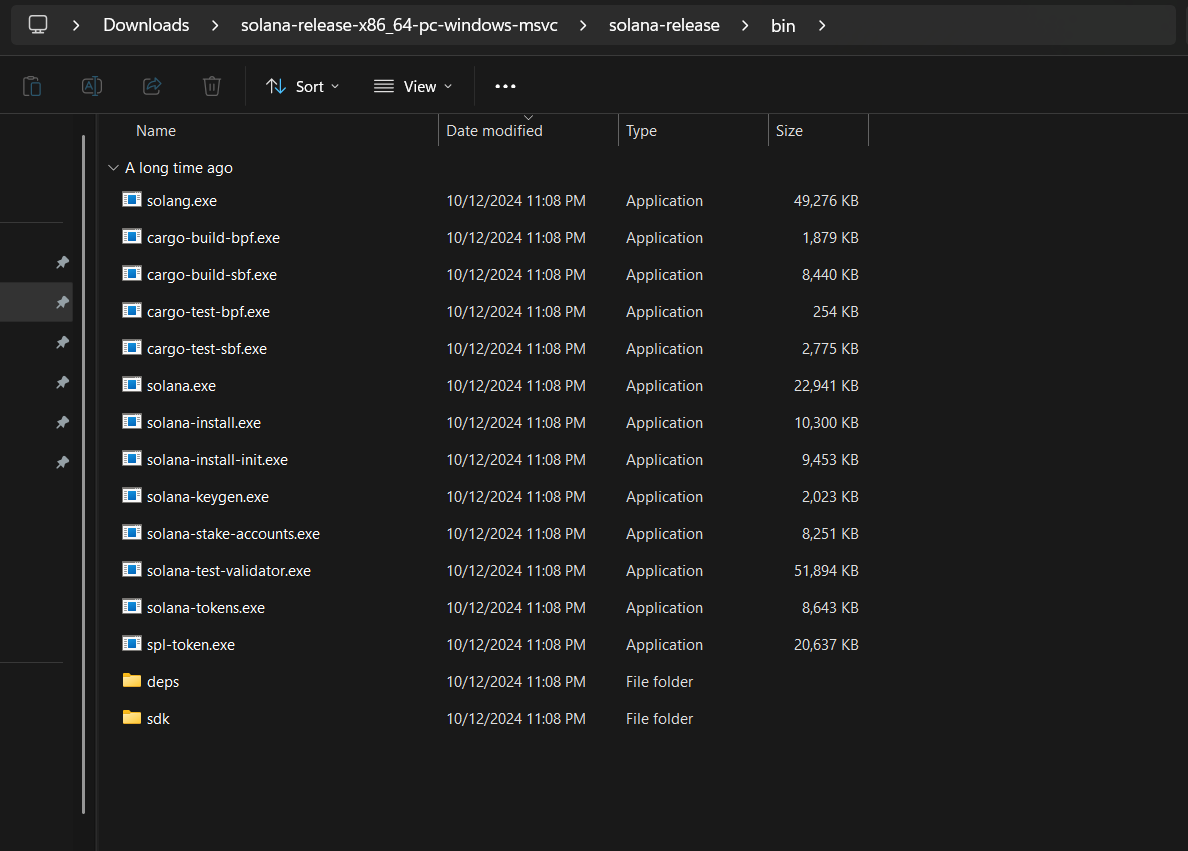
Here are the Binaries Located
Relocate the Binaries
C driveandC:\solana-cli\solana-releasein my case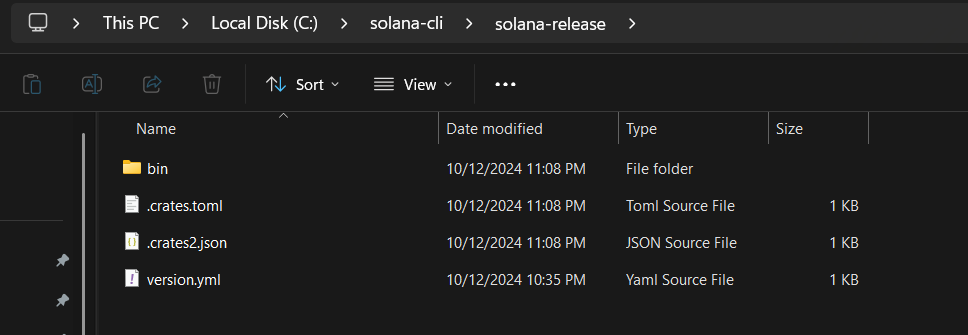
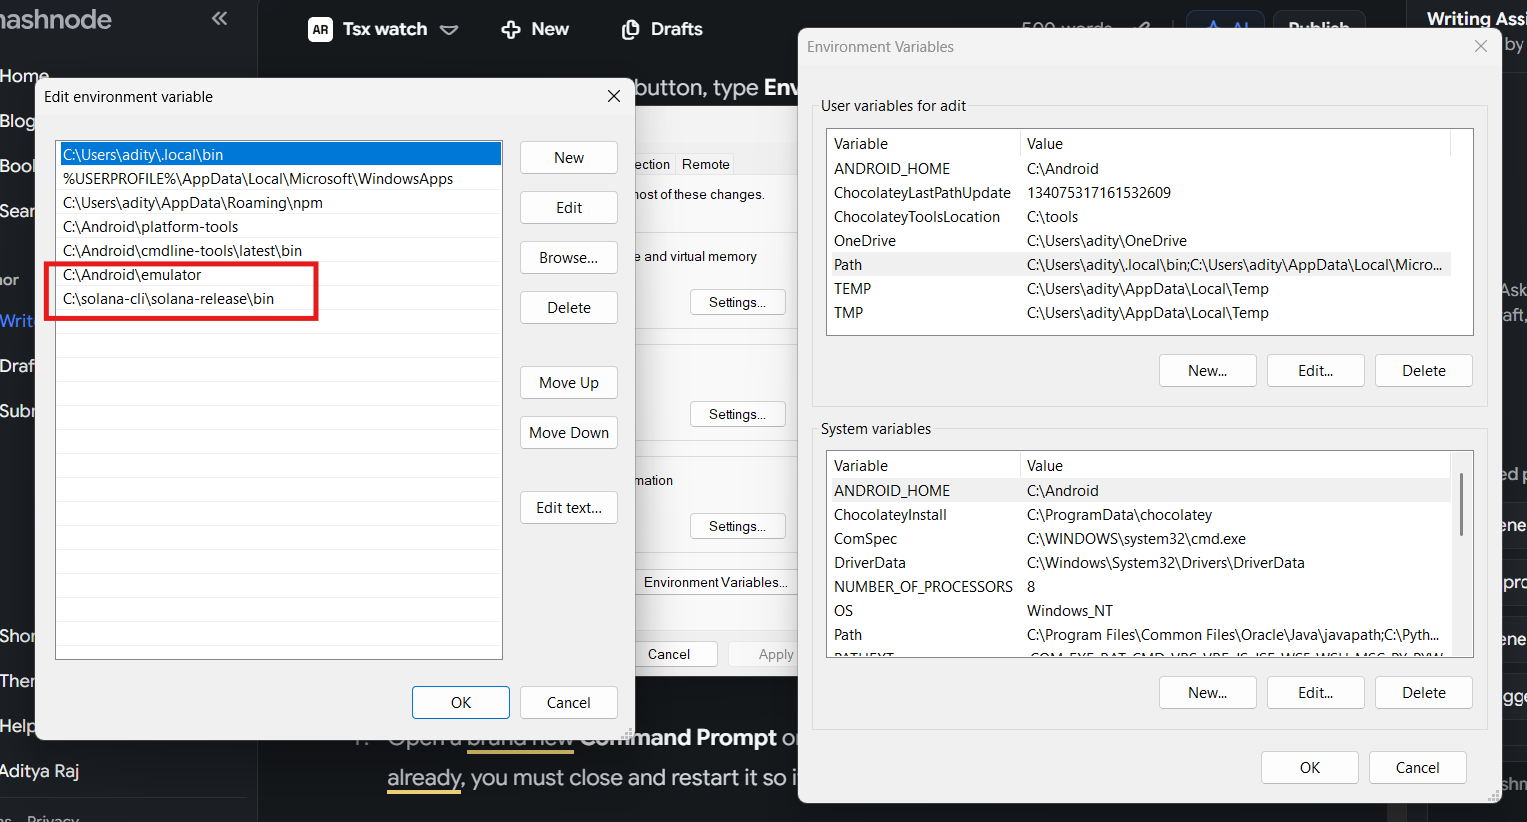
Step 3: Manually Add the CLI to your Windows PATH
To use Solana commands from any folder in your terminal, Windows needs to know exactly where those tools live.
Click the Windows Start button, type Environment Variables, and select Edit the system environment variables.
In the System Properties window that pops up, click the Environment Variables... button near the bottom right.
In the new window, look under the User variables (or System variables if you want it applied to all users) and find the variable named Path.
Select Path and click Edit.
Click New, and paste the exact folder path to the
bindirectory inside your extracted Solana folder. If you followed Step 2 exactly, this will be:C:\solana-release\bin.Click OK on all three windows to save your changes.
Step 4: Verify the Installation
Open a brand new Command Prompt or PowerShell window (if you had one open already, you must close and restart it so it can fetch the new PATH data).
Type the following command and press Enter:
solana --version
# solana-cli 1.18.26 (src:d9f20e95; feat:3241752014, client:SolanaLabs)
If everything is configured correctly, it will output the version of the Solana CLI you just installed!
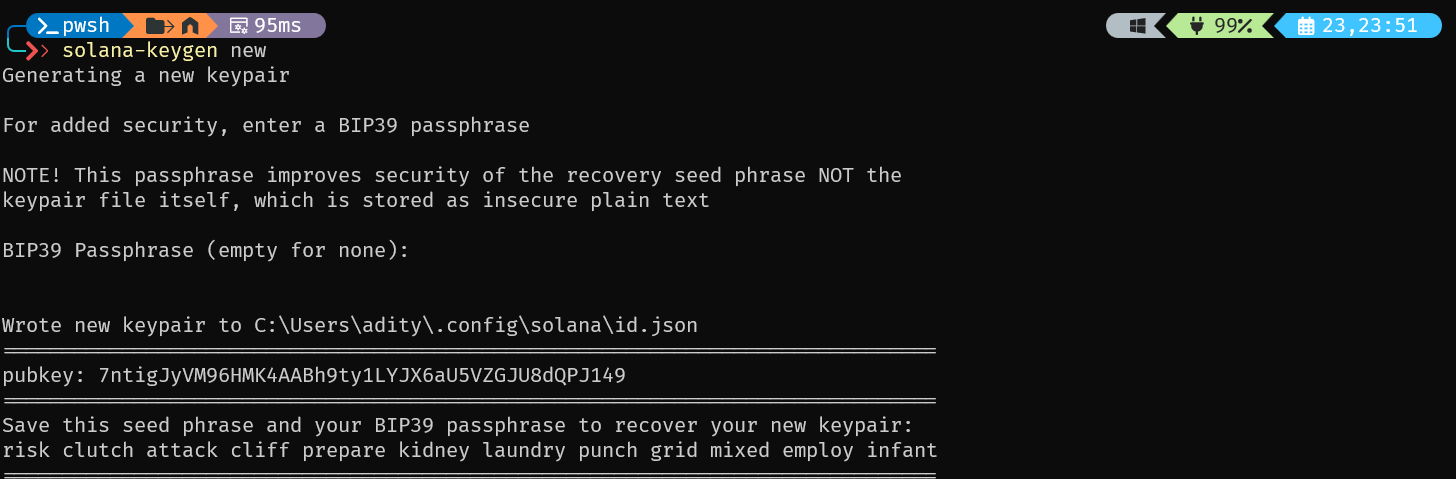
solana-keygenfor generating public-private keypair
solana get configto get config file content.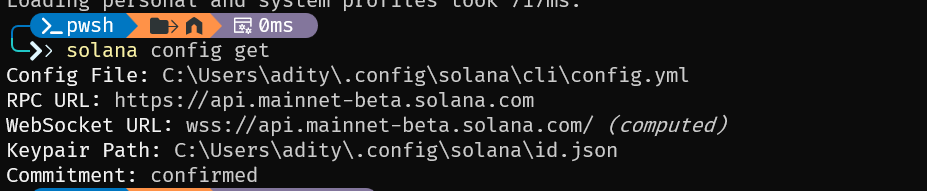
A few more commands
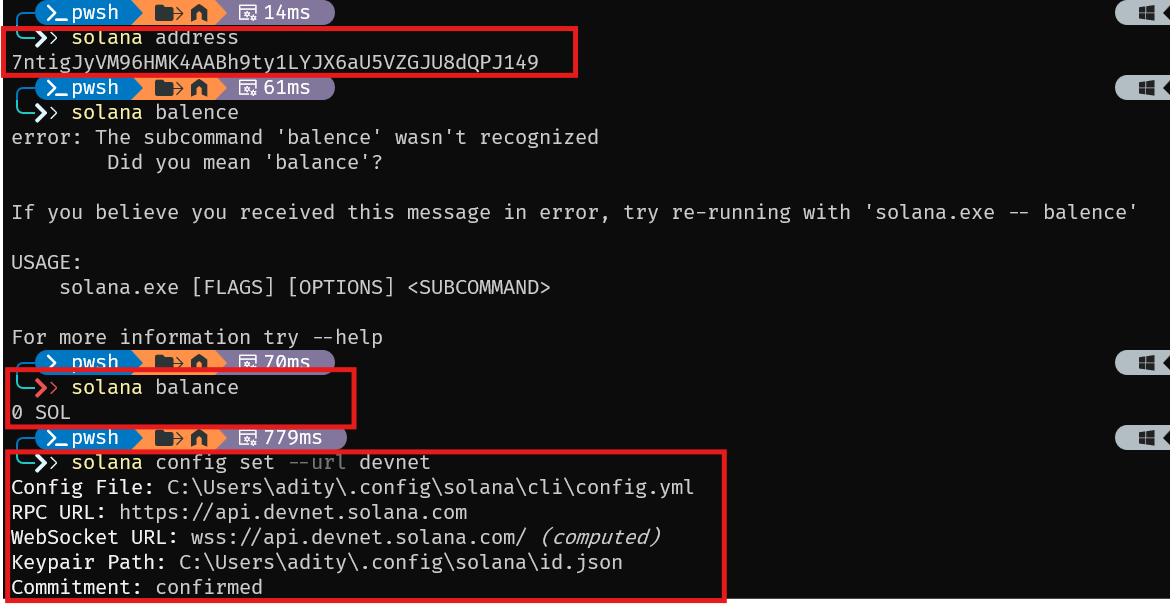
After Airdropping on devnet through https://faucet.solana.com/

Thanks for stopping by! If this helped you out, let me know. I'm actively exploring new ideas in AI and full-stack development, and I'd love to see what you're building too.
💼 LinkedIn • 🐙 GitHub • ✉️ Portfolio
Ref:
https://solana.com/docs/intro/installation/solana-cli-basics